Designing and Implementing a Wifi/GPRS gateway for IoT
Abstract
One of technologies that has been the focus of many people around the world in recent years is Internet of Things (IoT). The concept of IoT can be explained as a world that everything in it including inanimate objects have a digital identity. This novel technology has many interesting and various applications that expand from a simple smartphone connection to a home device to complex tasks like smart cities and power management.
In this repository, I try to familiarize and deepen your knowledge about this technology and its applications. Then I will explain a new branch of this tech called Narrowband IoT, which has more benefits compared to its predecessors. Lastly, I will show you how to build a GPRS gateway to a data server.
Internet of Things
Iot points to the connection between objects and their environment with the internet and our ability to control and manage them with applications on our smartphone and tablets. In simple terms, IoT is the network between sensors and machines, which can communicate with each other and their users. Experts have predicted that in next year (2020) their will be nearly 30 billion objects that are connected to the Internet
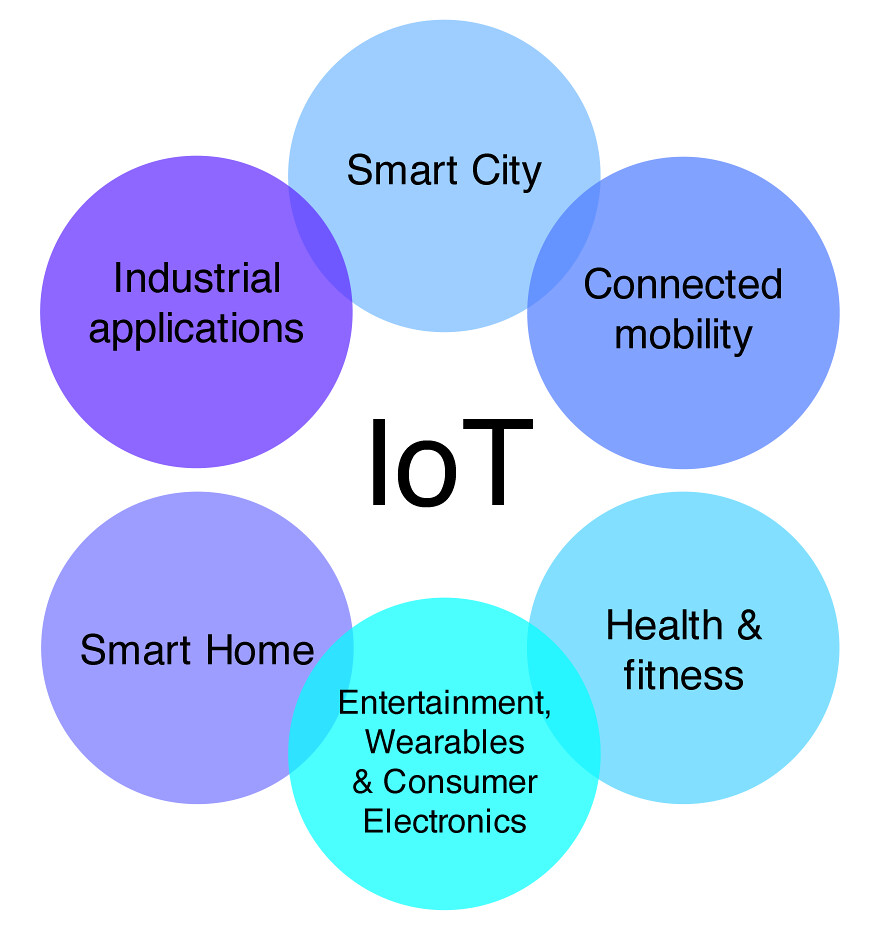
IoT Applications
IoT applications vary from infrastructures, energy, smart home, transportation and networking. Studies show that the most popular category that IoT is used in is Wearables and smart city.
-
Health: : IoT can help in Health by gathering the sensor data related to the vital signs of the patient and sending them to their doctors. Also by processing the data they can inform the patient about any kind of risk whenever and wherever they are.
-
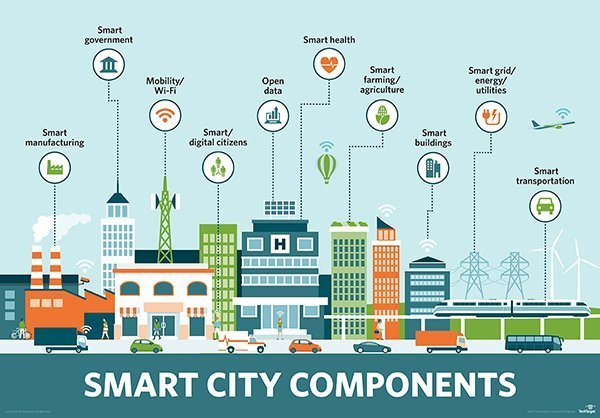
Smart city: Traffic control, managing city residual, smart parking and optimize transportation are a few of the benefits that users in a smart city can have.
Project
My project is to design and implement a GPRS/WiFi gateway for IoT devices. The goal is to first measure different data that are necessary for smart city servers such as humidity, temperature, air pollution etc. and send them using an Arduino Uno board and a SIM800L module (2nd generation) to a virtual server. This system can be deployed across the city for gathering data and processing them.
Design and Coding: For this project, we need wires, SIM800L module, Arduino Uno board, a sim card, regulator and a power supply. Since we are using a SIM800L module, we need a sim card for transmitting data and the supply for this module is between 3.8 and 4.2 volts. For saving the data, I have made a virtual server on the Thingspeak website. The code for the Arduino board is like below and was written in Arduino IDE software.
#include <SoftwareSerial.h>

float my_value = 105;
String apiKey = "N6M1F6OO21F89JYC";
SoftwareSerial ser(10, 11); // RX, TX

void printSerialData()
{
 while(ser.available()!=0)
 Serial.write(ser.read());
}

void setup() {
   Serial.begin(9600);
   ser.begin(9600);
}
void loop() {
  my_value++;
  float temp = my_value;
  char buf[16];
  String strTemp = dtostrf(temp, 4, 1, buf);
  Serial.println(strTemp);

  ser.println("AT+CIPSHUT");
  delay(1000);
  printSerialData();

  ser.println("AT+CIPMUX=0");
  delay(4000);
  printSerialData();

  ser.println("AT+CGATT=1");
  delay(1000);
  printSerialData();

  ser.println("AT+CSTT=\"mcinet\"");//setting the APN
  delay(5000);
  printSerialData();

  ser.println("AT+CIICR");
  delay(6000);
  printSerialData();

  ser.println("AT+CIFSR"); //init the HTTP request
  delay(2000);
  printSerialData();

  ser.println("AT+CIPSTART=\"TCP\",\"api.thingspeak.com\",\"80\"");
  delay(5000);
  printSerialData();
  delay(5000);
  if(ser.find("Error")){
    Serial.println("AT+CIPSTART error");
    return;
  }
  String getStr = "GET /update?api_key=";
  getStr += apiKey;
  getStr +="&field2=";
  getStr += String(strTemp);
  getStr += "\r\n";

  String cmd = "AT+CIPSEND=";
  cmd += String(getStr.length());
  ser.println(cmd);
  Serial.println(cmd);
  delay(5000);

  if(ser.find(">")){
    ser.print(getStr);
    Serial.println(getStr);
    ser.println("AT+RST");
    delay(30000);
  }
  else{
    ser.println("AT+CIPCLOSE");
    // alert user
    Serial.println("AT+CIPCLOSE");
    delay(3000);
  }
{
The apikey that was used in the code was provided by the Thingspeak website. The apn for our specific sim card was mcinet. The server on Thingspeak uses GET to update.
In this code by calling the SoftwareSerial library, I tend to link the Arduino Uno board and the module. By setting the Baud rate on 9600 which is the SIM800L frequency, I send the data. The function printSerialData will receive and displays the command on the Serial monitor.
- AT + CIPSHUT: Deletes all the previous commands
- AT + CSST: For connecting to the network is equal to the apn of the sim card
- AT + CIFSR: Connects the module to the network and receives the local IP address
- AT + CIPSTART: Connection to the thingspeak server and should display CONNECT OK
- AT + CIPSEND: The characters that are being sent
With the GET command that includes the apikey and field number and the measured data, the data is send to the Thingspeak server which a bit of delay. In the case of an error in CIPSEND, the AT + CIPCLOSE command will be executed and starts for the beginning. In the end, the server need about 15 seconds to update and AT + RST resets the process. For the layout of the circuit the SIM800L module is supplied with 4.5 volt and its TX pin is connected to the #10 pin of the Arduino Uno board and its RX pin to the #11 pin of the Arduino board like below.
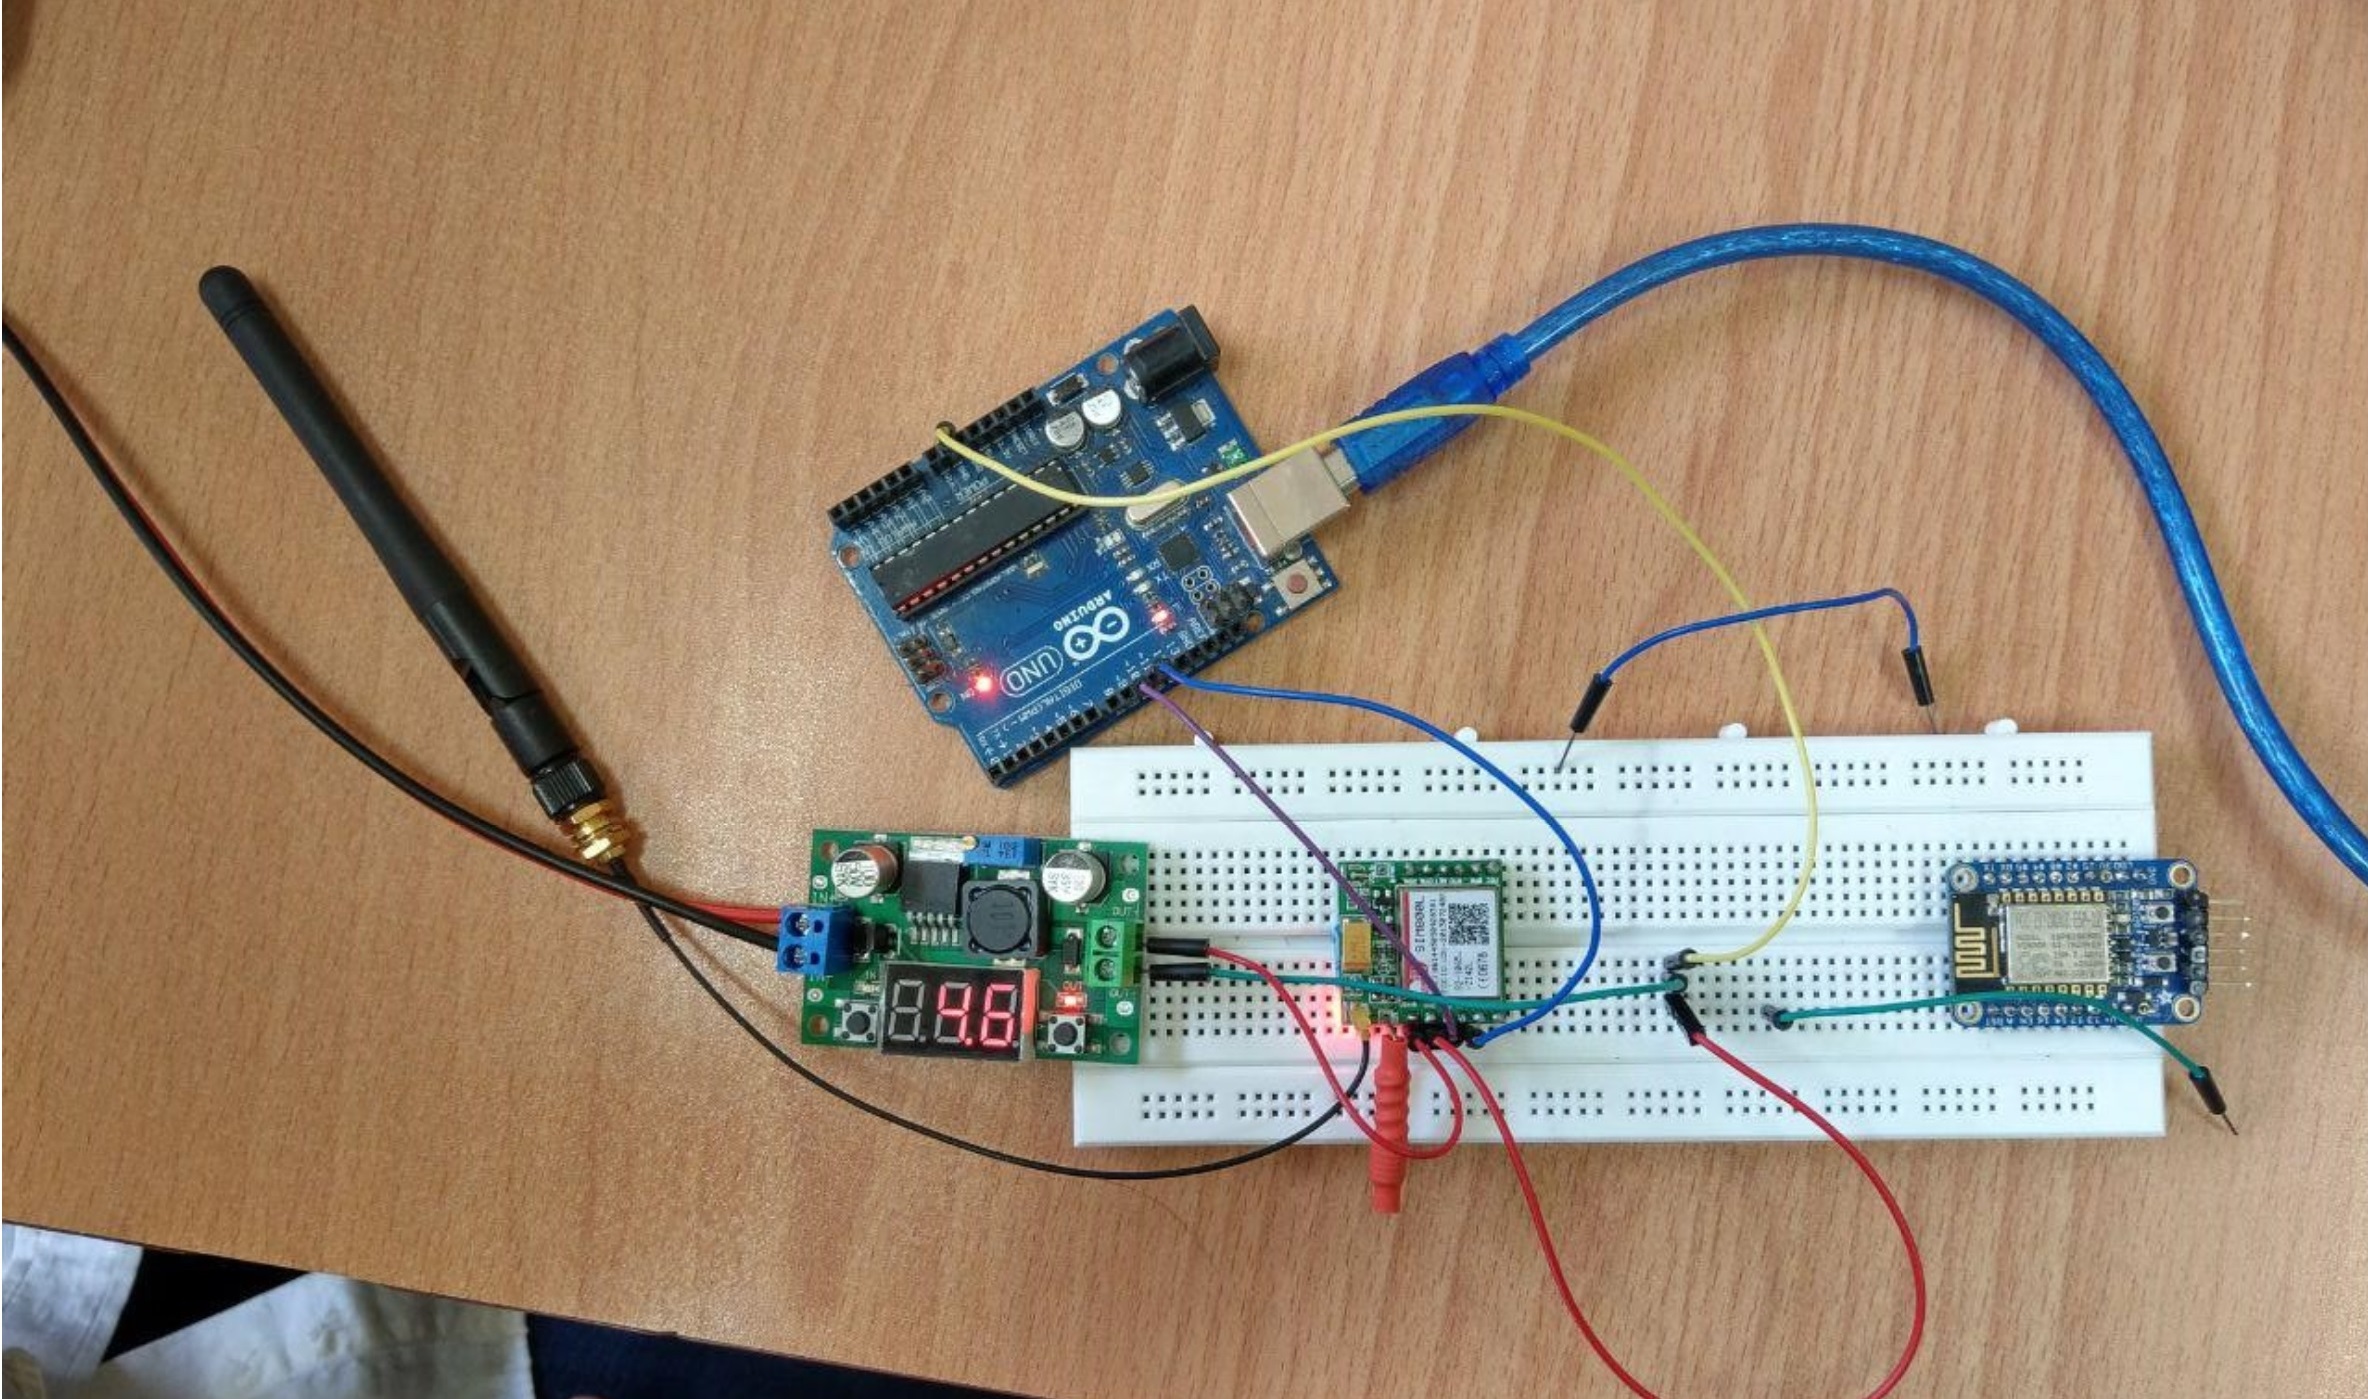
If the module is not exactly supplied with 4.5 volts, we get the OVER-VOLTAGE WARNING error and the code restarts.
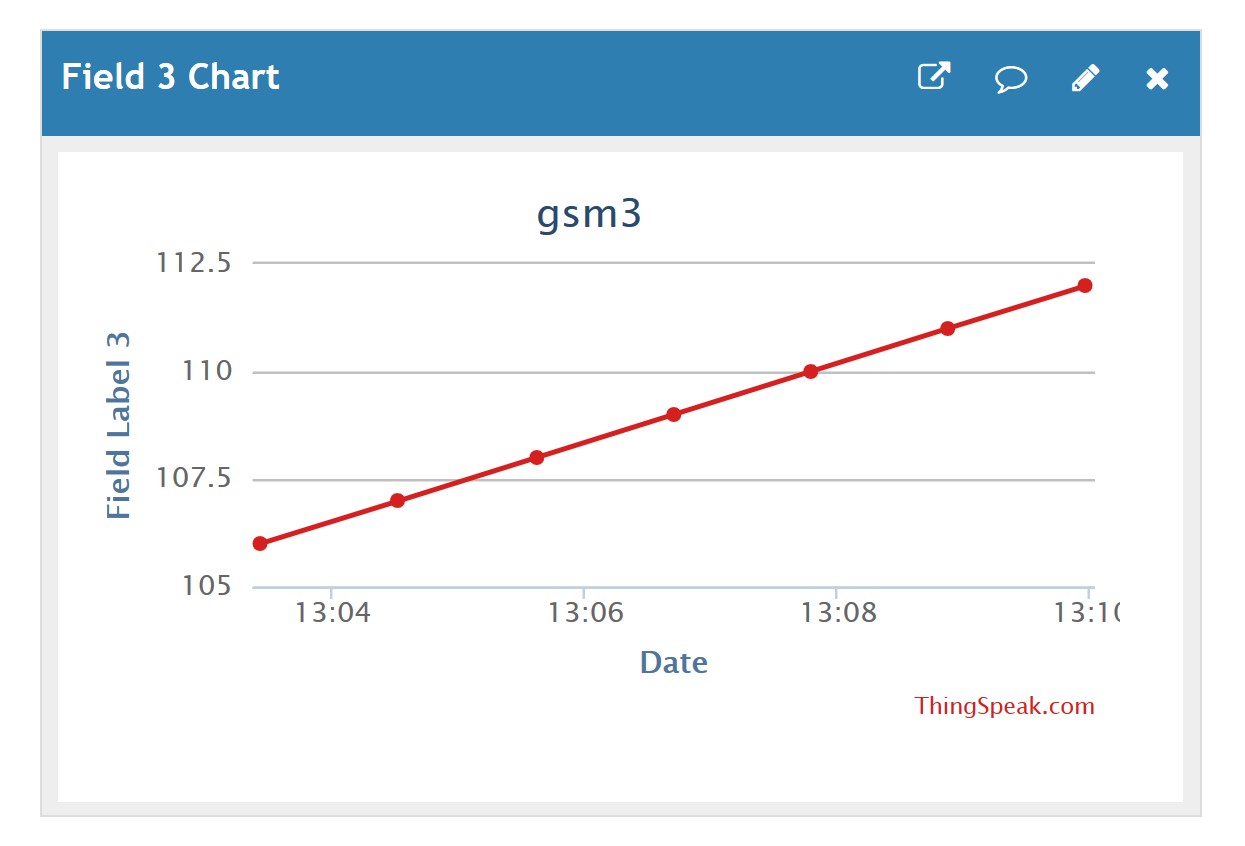
In the Serial Monitor page, you be able to see the response of the code like the picture below. The data that is being sent is just a number, in this case the number starts from 106 and each time adds one to it.
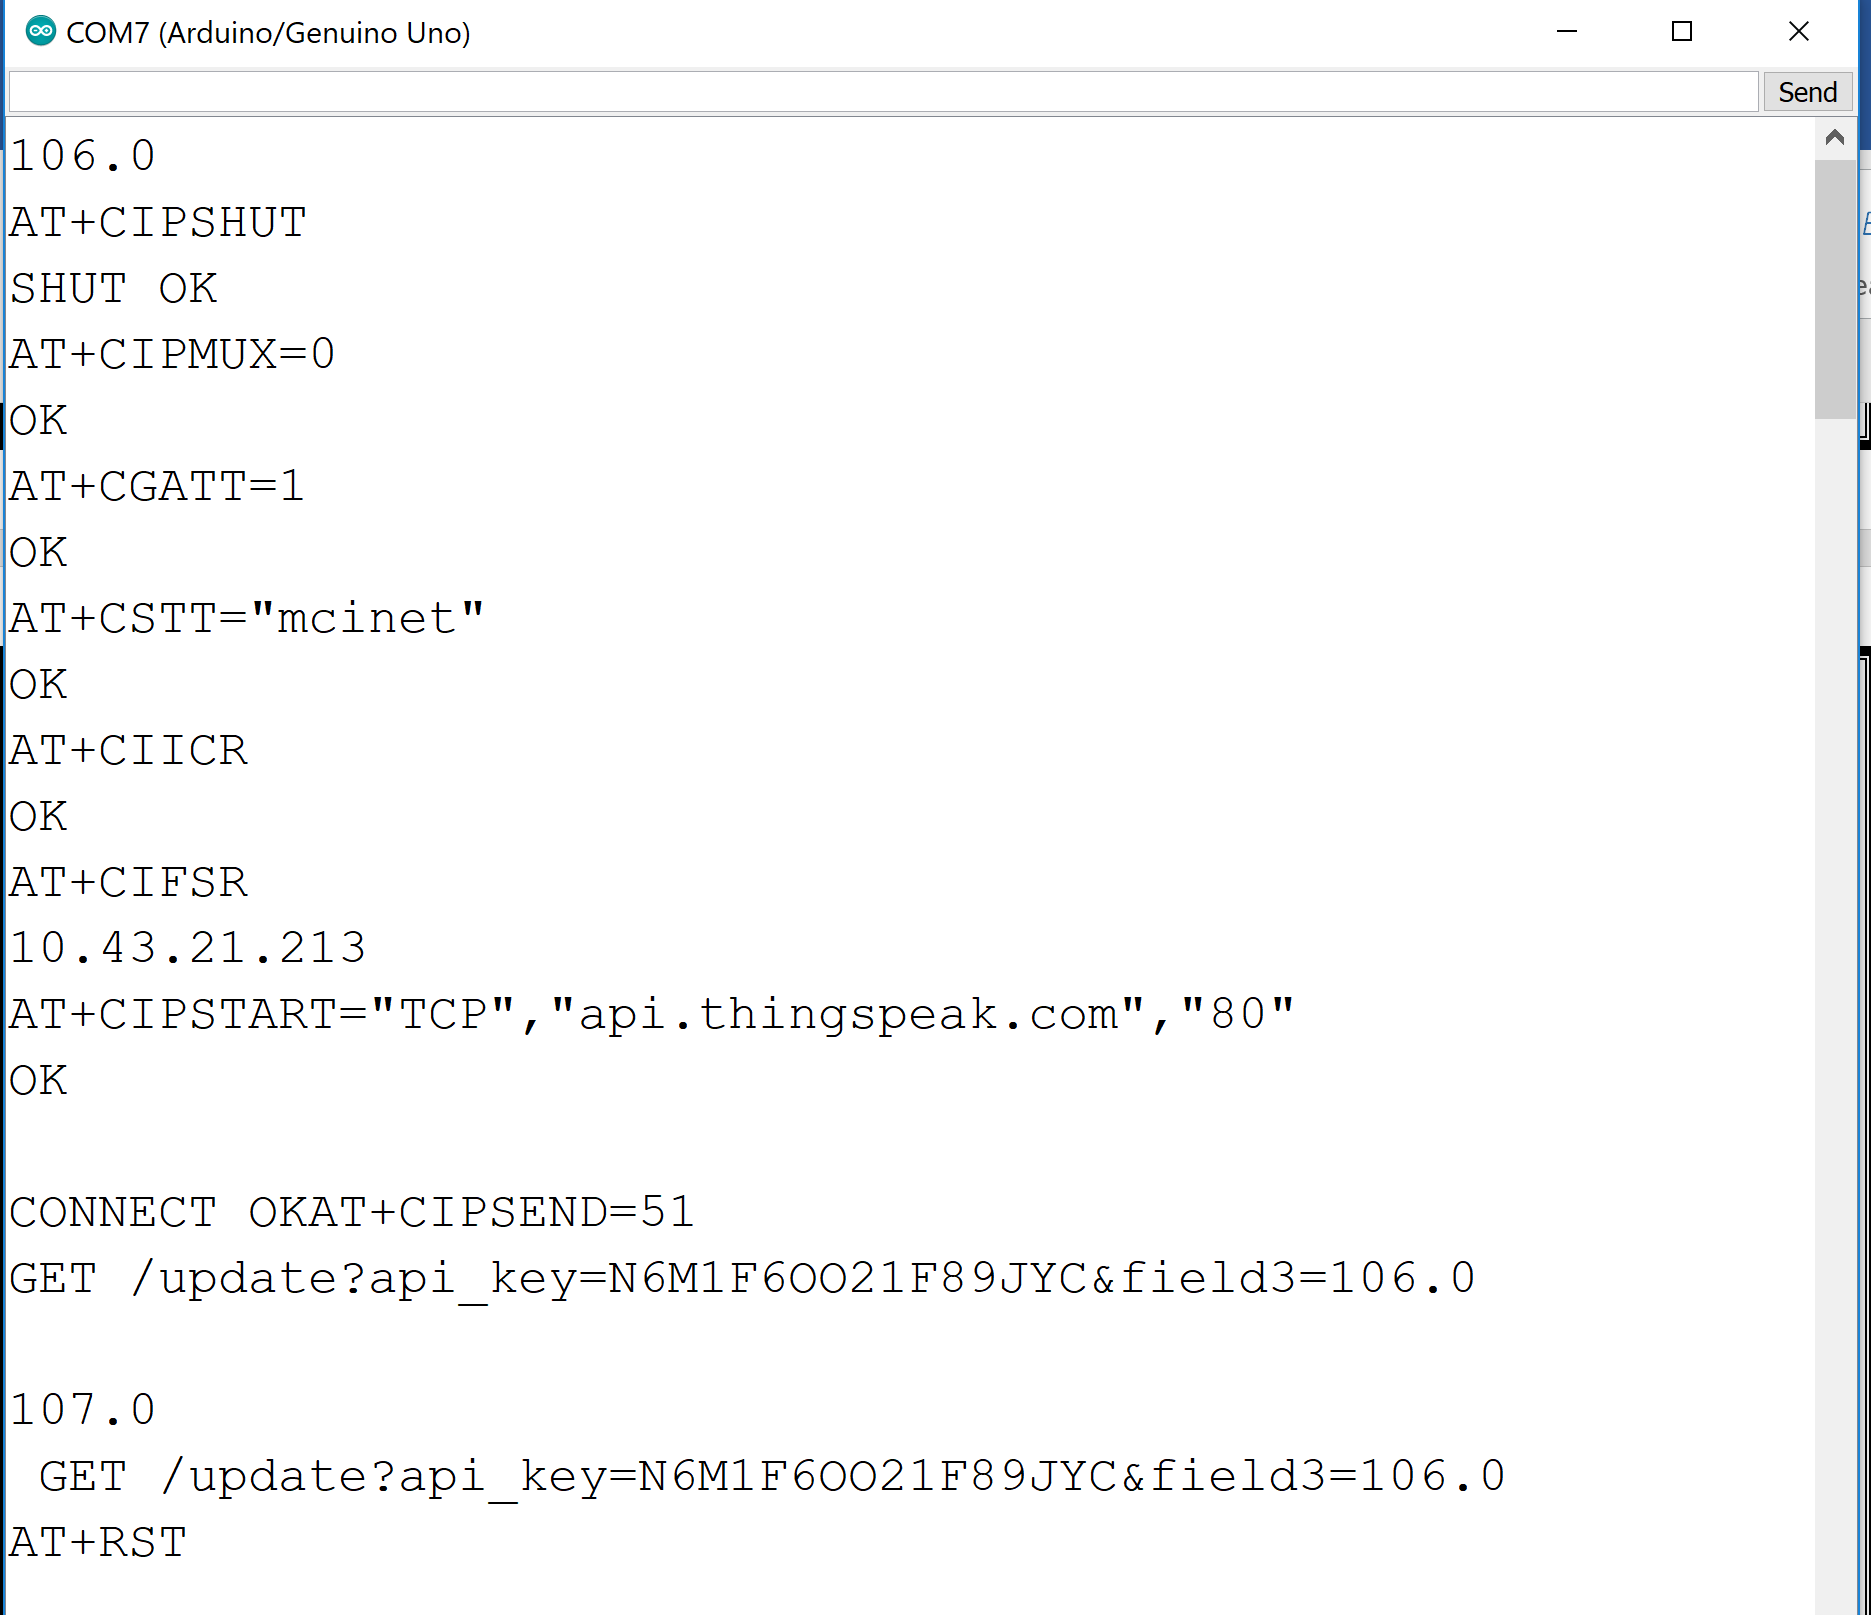
With this, you see that the GPRS gateway is successfully transmitting data to the Thingspeak server and their data is being represented in the form below.
In conclusion, we can use the devices around the city to transmit data and could use more advance modules such as SIM7500E, which is 4th generation.